Pinterest Script
 
Welcome to the World of Tulip Tie Dye!
tie dye party supplies
outdoor tie-dye party

Get this party started!


Throw the ultimate bash with Tulip One-Step Tie Dye!

From birthday parties to baby showers, summer camps, family reunions and more, there’s something for everyone to love in every bottle of outrageously vibrant dye. This section has everything you need to get the tie-dye party fun going! See below for a suggested party supply list and watch the video that shows you how to set up your tie-dye station. And don’t forget to download a FREE set of tie-dye party printables to complete your tie-dye party theme!

tie dye kits

Pick Your Tie-Dye Kit

So many options for tie-dye fun 

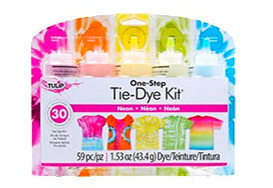
When planning your party, think about color options and how much dye you’ll need for your guest list. Unless you’re planning a specific theme, you’ll want a wide variety of colors. Luckily Tulip Tie-Dye Kits come in an extensive range of color themes with numerous options for creativity. The kits also include rubber bands and gloves for party goers to get their tie-dye groove on.  

tie-dye tools

Grab Some Extra Tools

Be ready for all types of creativity  

It’s true the Tulip Tie-Dye Kits include everything you need to have a great tie-dye experience. But sometimes party guests will want to get extra creative and experiment with some different techniques. Be ready for this with some extra rubber bands, extra gloves, extra bottles for mixing colors and even some tie-dye resist!  

refills

Refills to the Rescue!

Keep the party going with Tulip Tie-Dye Refills  

Everyone loves to get in on the fun of tie dyeing. To be sure you have enough dye for all party goers to create the tie dye of their dreams, stock up on some easy-to-use dye refills. This way when the popular colors are running low, you can save the day with quick color refills that use the same bottles from your kit. It’s an eco-conscious and crafty way to carry on the tie-dye excitement.  

A More Few Details You Won’t Want to Miss...

Here are extra supplies you might need:

  • Plastic bins (to contain dye projects while dyeing) – not necessary but good to have
  • Paper towels
  • Disposable plastic tablecloth
  • Plastic zipper bags (to store tie-dye projects in after dyeing)
  • Permanent markers (to label bags with each person’s name)
  • Bucket/sink for dampening shirts
  • Colorful snacks – of course!
Download Supply Checklist (PDF)

Tie-Dye Station Setup

Check out our How To Tie Dye section here for some great tips on the tie-dye basics. 

1. Have a table set up specifically for tie dye. Cover it with a plastic tablecloth and set up bins, paper towels, dye bottles and all extra supplies easily within arm’s reach of each dye station.

2. Prefill all of the dye bottles and shake to mix (if you’re in a time crunch), otherwise, incorporate the mixing process into the activity!

3. Have everyone dampen their T-shirt, whether dunking in a bucket or using the sink. Make sure they wring out their shirt very well before taking to their tie dye station.

4. Partygoers can now choose their favorite tie-dye pattern from the tie-dye instruction guide! Have them follow the steps to fold and bind their shirt, securing with the rubber bands that come in the kit.

5. Each person should now put on their gloves and place their project in their bin (if using). Tip: line bins/work surface with paper towels to absorb the extra dye when applying.

6. Let the tie-dye fun begin! Have everyone apply the dyes of their choice to their T-shirt. When finished, place the dyed shirt in a zipper bag labeled with each guest’s name and seal. Make sure guests leave their shirt in their bag for at least 8 hours for the dye to completely set. Follow instructions included in the guide for laundering.

7. Optional: send each person home with their own tie-dye instruction guide for future fun!

8. Download the delightful FREE tie dye Printables from Lillian Hope Designs! - Download Printables
Close